Free data recovery software can help when important files suddenly disappear from your Mac. Have you accidentally emptied the Trash, deleted a document you still need, or lost photos after a system issue? It’s easy to panic and assume those files are gone forever.
Fortunately, deleted files on macOS often remain recoverable until they are overwritten by new data. The key is to act quickly and use the right recovery method.
In this guide, you’ll learn what happens when files are deleted on a Mac, the best ways to recover them, and how to restore your data safely without causing further loss.
Part 1: What Really Happens When You Delete Files on Mac
Many Mac users assume that deleting a file instantly removes it from the system. In reality, that’s not how macOS works.
When you delete a file, macOS usually moves it to the Trash folder. The file remains there until you manually empty the Trash. Even after the Trash is emptied, the file’s actual data often remains stored on the drive.
Instead of immediately erasing the data, macOS simply marks that storage space as available for future use. The operating system can then overwrite that space whenever new files are saved.
This is why deleted files can often be recovered.
Here’s what typically happens:
The file is moved to Trash.
Emptying Trash removes the file’s reference.
The storage space is marked as reusable.
The original data remains until overwritten.
The most important factor is timing. The longer you continue using the Mac after data loss, the greater the risk that new files will overwrite the deleted data.
If you’ve lost important files, stop saving new data immediately and begin recovery as soon as possible.
Part 2: Common Ways Files Get Lost on Mac
Data loss doesn’t always happen because of major system failures. In many cases, files disappear during everyday computer use.
Accidentally Emptying Trash
This is one of the most common causes of file loss. Many users empty Trash without realizing important files are still inside.
Once Trash is emptied, files become inaccessible through normal methods.
Permanent Deletion
Using shortcuts such as Command + Delete or other file removal options can permanently remove files without giving you much time to reconsider.
macOS Crashes and Updates
Unexpected shutdowns, failed updates, or operating system crashes can sometimes result in missing files.
Although modern versions of macOS are highly stable, data loss can still occur during interrupted system processes.
Disk Errors and Corrupted Storage
Hard drives, SSDs, USB drives, and external storage devices can develop file system corruption or bad sectors.
When this happens, files may become inaccessible even though they still exist on the device.
Formatting Mistakes
Formatting the wrong drive is another surprisingly common issue. A single mistake can make an entire collection of files appear lost.
No matter how the files disappeared, the first rule remains the same:
Stop writing new data to the affected drive immediately.
Doing so increases the chances of successful recovery.
Part 3: The Smart Way to Recover Deleted Files on Mac
When files disappear, several recovery methods may be available.
However, not all recovery options are equally effective.
Option 1: Recover Files from Trash
If the file is still in Trash, recovery is simple. You only need to locate the file and restore it to its original location.
The downside is obvious: this only works for recently deleted files.
Option 2: Restore from Time Machine
Apple’s Time Machine is an excellent backup solution. If you have enabled Time Machine before losing data, you can restore previous versions of files and folders.
However, many users never configure Time Machine or forget to connect their backup drive regularly.
Option 3: Use Free Data Recovery Software
If the file is permanently deleted and no backup exists, recovery software becomes your best option. Professional recovery tools can scan storage devices directly and locate deleted files before they are overwritten.
This makes free data recovery software for deleted files one of the most practical solutions available for Mac users.
Part 4: Recover Deleted Files on Mac for Free (Step-by-Step)
Here’s how you can recover deleted files on Mac for free:
Step 1: Check Trash First
Before using any recovery tool, check whether the file is still in Trash.
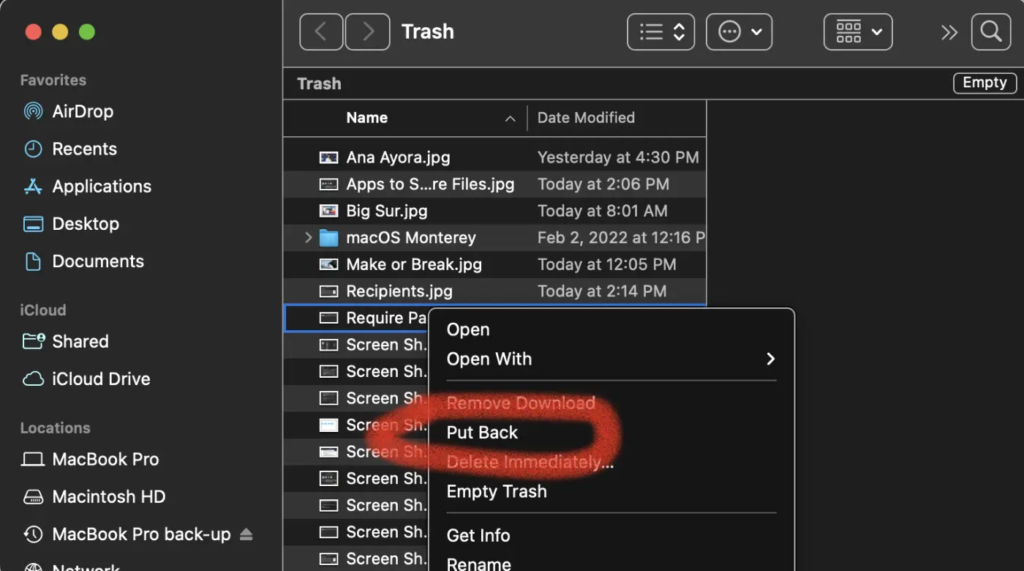
Here’s how to restore files from trash:
Open Trash from the Dock.
Search for the deleted file.
Right-click the file.
Select Put Back.
The file will return to its original location.
If the file is no longer in Trash, continue with the next step.
Step 2: Use Free Data Recovery Software
One of the easiest solutions available today is 4DDiG Mac Data Recovery. Designed specifically for Mac users, 4DDiG helps recover lost data without requiring advanced technical knowledge.
Key features include:
Recover files after Trash is emptied
Support for over 2000 file types
Recover photos, videos, documents, emails, and audio files
Works with Mac internal drives
Supports external drives, USB flash drives, and SD cards
Free scan and preview functionality
User-friendly interface suitable for beginners
Whether you’ve accidentally deleted files or experienced storage corruption, 4DDiG provides a reliable Mac Data Recovery solution.
Step 3: Restore Your Files with 4DDiG
1.) Download and Install the Software
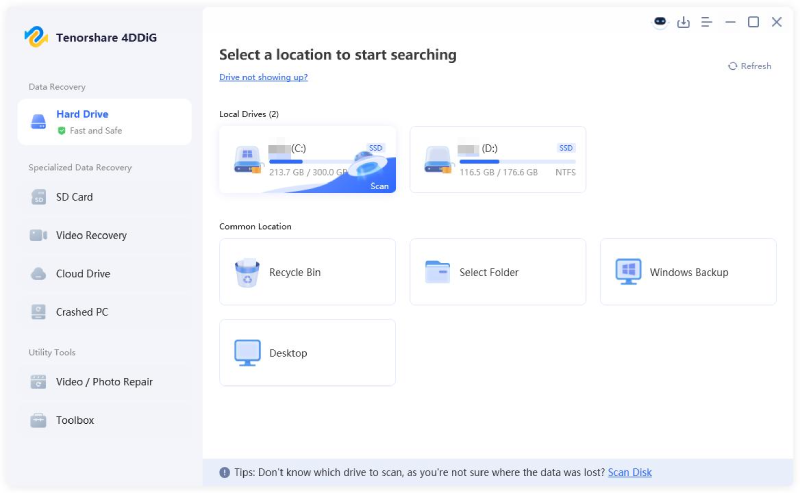
Download 4DDiG Mac Data Recovery and install it on your Mac. After that, launch the application and select the drive where the files were lost.
2.) Scan for Deleted Files
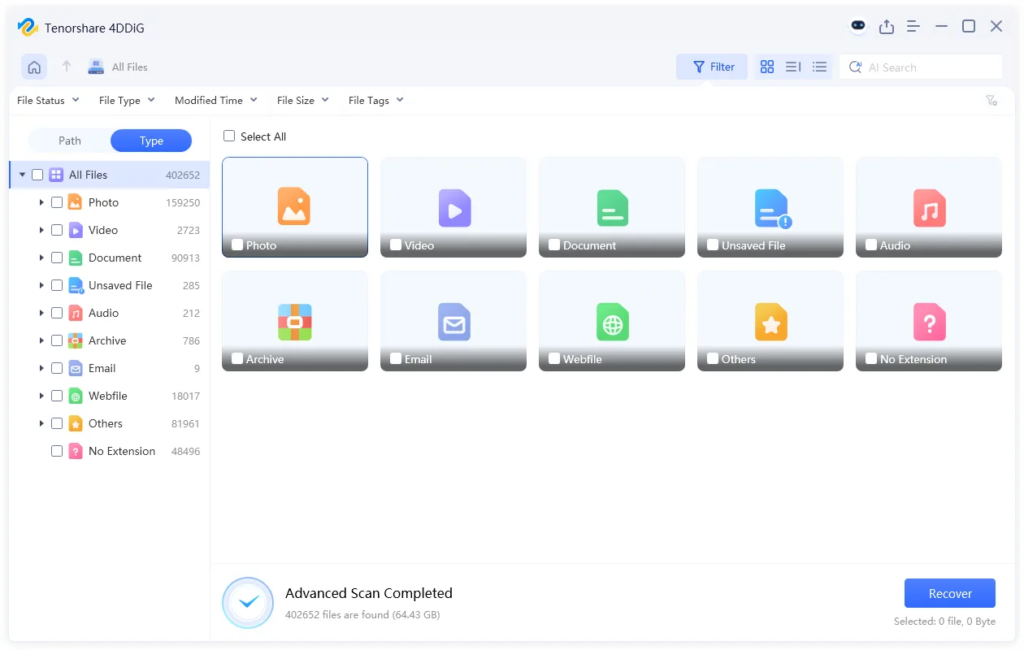
Click Scan to begin searching for deleted and lost files. The software will automatically analyze the selected drive and display recoverable data.
You can browse results by:
File type
File path
Search filters
Keywords
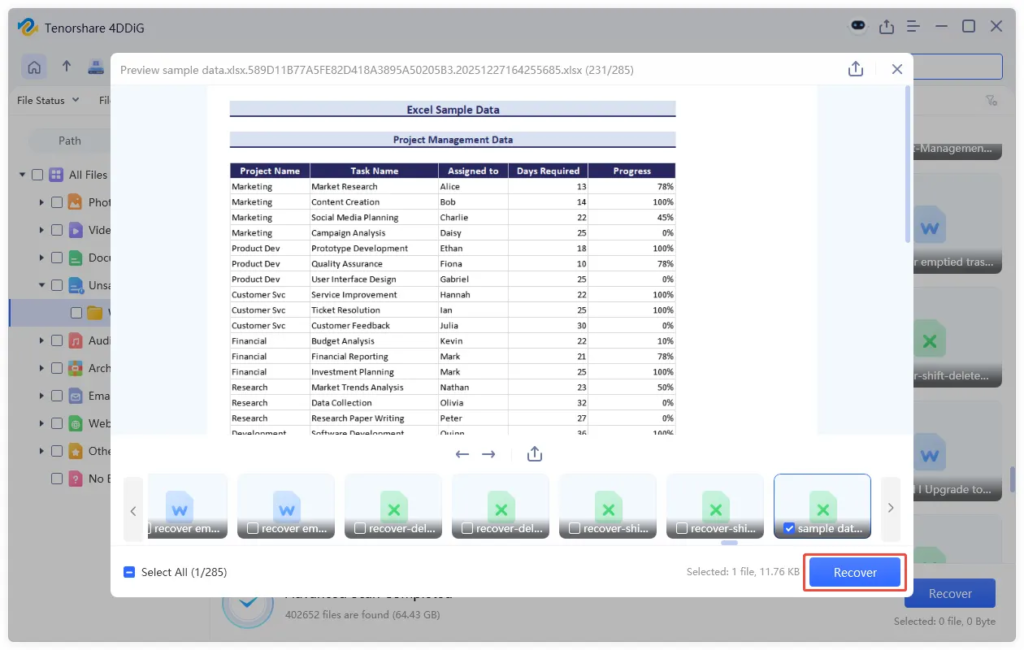
3.) Preview Recoverable Files
Before recovery, 4DDiG allows you to preview many file formats. This helps verify that the files are recoverable before restoring them.
4.) Recover to a Safe Location
Select the files you want to restore and click Recover. Save recovered files to a different location rather than the original drive to prevent overwriting.
Step 4: Restore from Time Machine (If Available)
If you’ve previously enabled Time Machine, restoring deleted files is straightforward.
Steps to Restore Using Time Machine
Connect your Time Machine backup drive.
Open Time Machine.
Navigate to the folder where the file was originally stored.
Browse previous backup versions.
Select the desired file.
Click Restore.
The file will return to its original location.
While Time Machine is effective, it only works if backups were created before the data loss occurred.
Part 5: Additional Recovery Paths
In addition to recovery software and Time Machine, other recovery options may be available depending on your setup.
Check iCloud Drive
If iCloud Drive is enabled, you may find deleted files in the Recently Deleted section.
Apple often retains deleted cloud files for a limited period.
Review Cloud Backups
Services such as:
Google Drive
Dropbox
OneDrive
often maintain file version history and deleted-file recovery options.
Check your cloud account before assuming data is permanently lost.
App-Specific Recovery Features
Some applications provide their own recovery options.
Examples include:
Photos
Notes
Pages
Microsoft Office
These apps may contain recently deleted sections or version history tools.
While these methods can be helpful, they should be viewed as complementary recovery options rather than complete replacements for dedicated recovery software.
Part 6: How to Prevent File Loss on Mac
Although recovery tools are extremely useful, prevention is always better than recovery.
Enable Time Machine Backups
Time Machine remains one of the most effective protection methods available for Mac users. Automatic backups ensure you always have a recovery point available.
Review Files Before Emptying Trash
Many data loss incidents occur simply because users empty Trash too quickly. Take a few seconds to review its contents first.
Store Important Files in the Cloud
Cloud storage provides an additional layer of protection. Services such as iCloud Drive, Dropbox, and Google Drive can automatically sync important files.
Avoid Untrusted Software
Installing software from unknown sources can expose your Mac to malware, corruption, and system instability. Download applications only from trusted developers.
Maintain Multiple Backups
Professionals often follow the 3-2-1 backup strategy:
Three copies of your data
Two different storage media
One offsite backup
This dramatically reduces the risk of permanent file loss.
Part 7: Final Words
Losing files on a Mac can be stressful, but it doesn’t always mean your data is gone forever. In many cases, deleted files remain recoverable until new data overwrites them. Acting quickly gives you the best chance of success.
While Trash and Time Machine are useful recovery options, they aren’t always available. That’s why many users rely on best free data recovery mac solutions such as 4DDiG Mac Data Recovery. With support for thousands of file types, free scanning, file preview, and simple recovery steps, it offers an effective way to recover lost data without technical complexity.
If you’ve recently lost important files, stop using the affected drive and begin recovery immediately to maximize your chances of restoring your data successfully.
FAQs
Q1: Can I recover deleted files on Mac for free?
Yes. Many free data recovery tools allow you to scan your Mac for deleted files and preview recoverable data before restoring it. Depending on the software and the amount of data, you may be able to recover files at no cost.
Q2: Can I recover files after emptying Trash on Mac?
Yes. Emptying the Trash does not immediately erase the actual file data from your storage device. As long as the deleted files have not been overwritten by new data, recovery software can often locate and restore them successfully.
Q3: Is it safe to use Mac data recovery software?
Yes, provided you choose a trusted and reputable recovery solution. Tools like 4DDiG are designed to scan storage devices in a safe, read-only manner, helping recover lost files without modifying or damaging your existing data.
Q4: How long do deleted files stay recoverable?
Deleted files can remain recoverable for days, weeks, or even months, depending on how much you continue using the drive. Once new data overwrites the storage space containing the deleted files, recovery becomes much more difficult or impossible.
Q5: What types of files can be recovered?
Modern data recovery software can restore a wide range of file types, including photos, videos, documents, spreadsheets, audio files, emails, archives, and more. 4DDiG supports over 2,000 file formats across different storage devices and systems.